How to import and geolocate SMAP Level-1C and Level-2 data in ENVI
The following are instructions on how to import and geolocate SMAP Level-1C HDF5 data in ENVI.
Testing notes
Software: ENVI
Software version: 5.3 and above. If using version 5.3, service pack 5.3.1 is needed.
Platform: Windows 7
Data set: SMAP L1C Radiometer Half-Orbit 36 km EASE-Grid Brightness Temperatures (SPL1CTB)
Data set version: 2
Date tested: 12/14/15
Note: These instructions apply to the SPL1CTB data in the global EASE-Grid 2.0 projection, but only need slight modifications to apply to the SMAP Level-2 data sets (SPL2SMA, SPL2SMP, SPL2SMAP).
1. Obtain data.
- Download the SMAP Level-1C Brightness Temperature HDF5 file of interest to you (e.g., SMAP_L1C_TB_04586_A_20151211T024445_R12170_001.h5).
2. Open SMAP data in ENVI.
- Start ENVI and select File > Open…
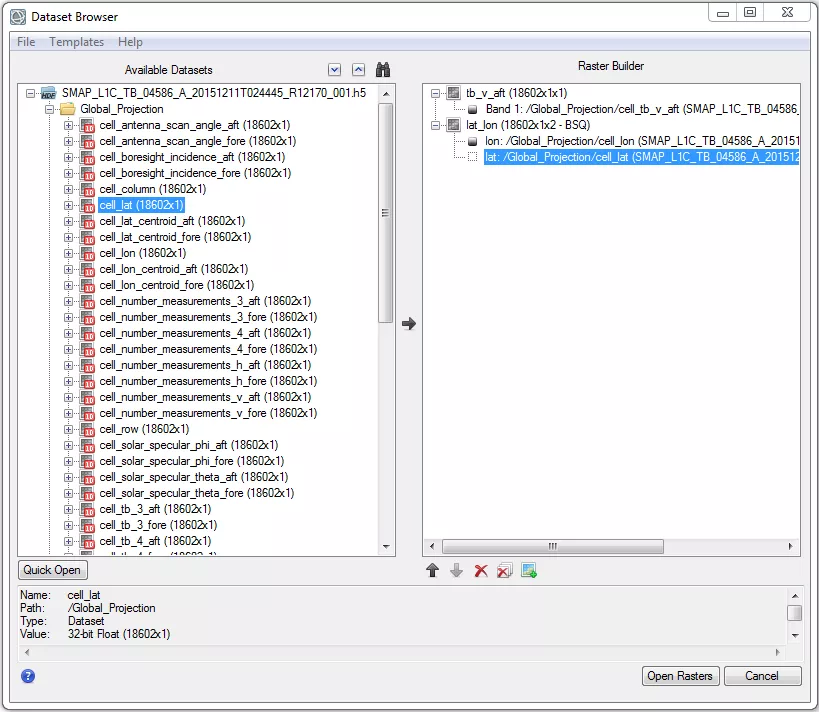
Select the SMAP data file (e.g., SMAP_L1C_TB_04586_A_20151211T024445_R12170_001.h5). - In the Dataset Browser, select the dataset(s) that you would like to display (e.g., Global_Projection/cell_tb_v_aft). Add these to the Raster Builder using the arrow icon. Note that you may want to add a new raster for each SMAP dataset that you select.
- Add a new raster and select and add the appropriate latitude and longitude datasets (e.g., Global_Projection/cell_lat and /cell_lon) to the same raster. It is helpful to rename the bands appropriately (e.g., ‘lat’ and ‘lon’).
- Select Open Rasters.
3. Build a Geographic Lookup Table (or, GLT).
- In the Toolbox, select Geometric Correction > Build GLT.
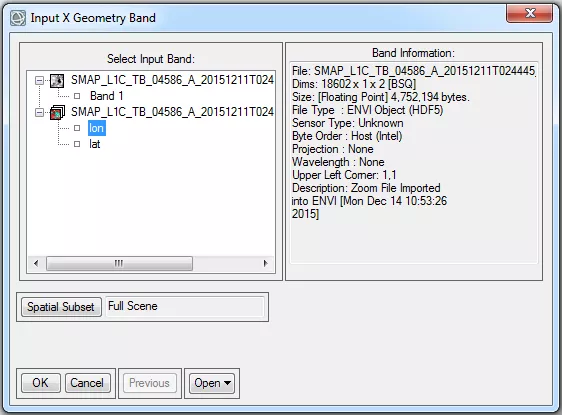
- In the Input X Geometry Band dialog box, select the longitude band that you added in the previous step.
- Click OK.
- In the Input Y Geometry Band dialog box, select the latitude band.
- Click OK.
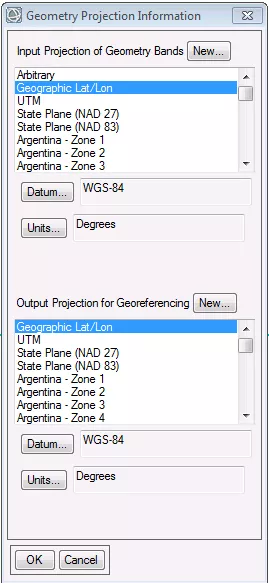
- In the Geometry Projection Information dialog box, select the following parameters:
Input Projection of Geometry Bands: Geographic Lat/Lon
Datum: WGS-84
Units: Degrees
Output Projection for Georeferencing: Geographic Lat/Lon
Datum: WGS-84
Units: Degrees
- Click OK.
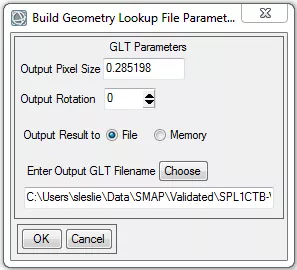
- In the Build Geometry Lookup File Parameters dialog box:
Change the Output Rotation to 0.
Select Choose (for Enter Output GLT Filename) and provide a location and name for the output GLT file.
- Click OK.
4. Georeference the SMAP data from the GLT.
- In the Toolbox, select Geometric Correction > Georeference from GLT.
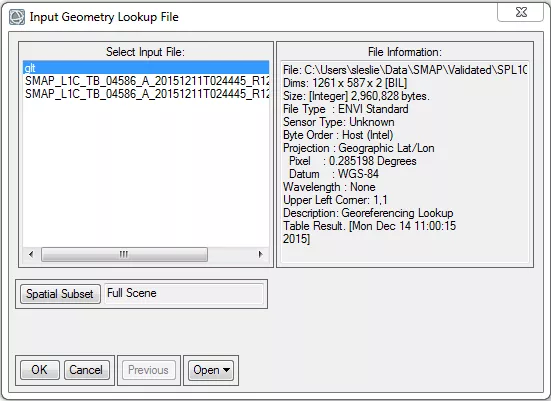
- In the Input Geometry Lookup File dialog box, select the GLT file you just built.
- Click OK.
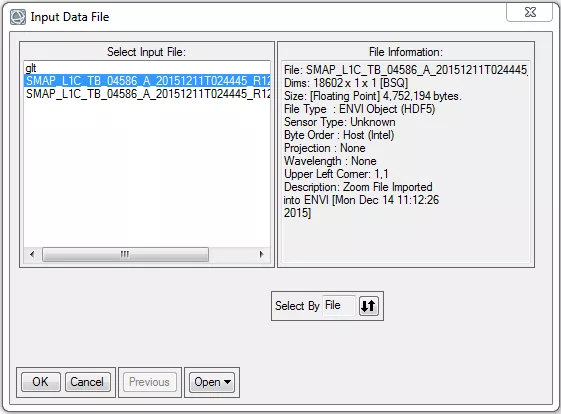
- In the Input Data File dialog box, select the SMAP data file of interest to you. Note that although the latitude/longitude raster will be displayed with the same file name, it can be distinguished by its 18602 x 1 x 2 dimensions (i.e., ‘Dims’ in the ‘File Information’ box).
- Click OK.
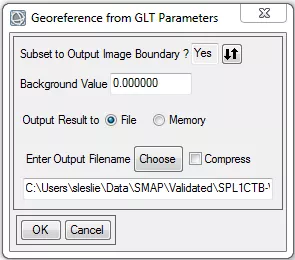
- In the Georeference from GLT Parameters dialog box, select Choose (for Enter Output Filename) and provide a location and name for the output data file.
- Click OK.
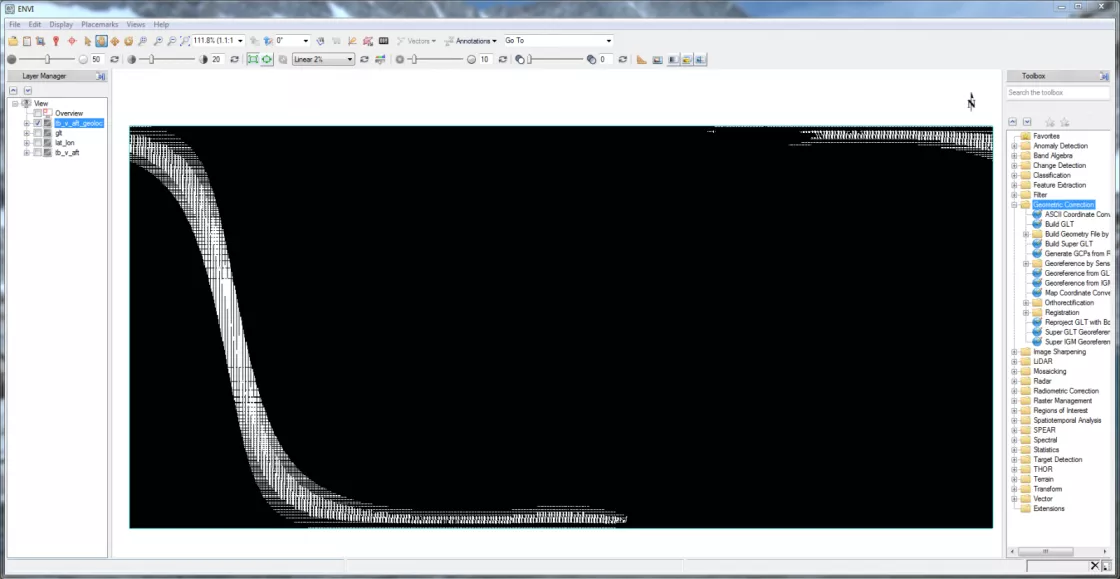
And, now you have a geolocated raster!
Last Updated March 2018
